Showing posts with label Mixed Blossom stamp. Show all posts

Monday, 27 January 2014

Card-in-a-Box and Class Schedule for February & March

My five weeks of summer holidays draws to a close. :(

Back to work tomorrow, and what is the weather going to be but sunny and 39 degrees (think that's 100 Fahrenheit!!!!) so it's not going to be fun.

And I've had so much fun over summer! Meals out with friends, friends from near and far to visit, family spending time at the beach with us (its so much fun with small children to play with) and lots and lots of crafting time!

These Card-in-a-Box creations began to appear late last year, and I've had a play about with a few different versions. This one is based on measurements given by Monica Gale, a UK Stampin' Up! demonstrator. It turns out rather large, and apart from that, I wasn't aware that it was best to not extend too far beyond the edges, because  then it doesn't fit in an envelope! Luckily I have my Envelope Punch Board and I used a 11½ inch square piece of DSP to make a giant envelope.

So, next I checked around and found another tutorial, this time by Australian demonstrator, Tanya Bell. Tanya is very clever, and generous also. She shared the smaller dimensions that mean the Card-in-a-Box will fit in a standard C6 envelope, readily available here. I have decided to offer this as a special Project Class in February or March. You need to click on the CLASSES tab at the top of the blog, and check the list of dates that I have available. If you have 3 hours free on one of the days I've nominated, send me an email or text (0417 500 681) and we will see what we can work out. I need two participants to run a class, so if you also have a friend who wants to craft, we could be good-to-go, otherwise I will place it up as a class taking place and we will see if anyone else wants to join you and create.
 You probably need to have had some experience with paper cutters, precise measurements are required (and the equipment and measurements are imperial, not metric) but I will demonstrate the construction process before you embark on your own Card-in-a-Box.


There are other classes available too, for beginners and more experienced crafters, maybe we can get together soon...
Rachel

Thursday, 7 June 2012

More Convention Highlights

Although there are so many exciting things happening at Convention, I think one of the main highlights would have to be the people you meet. There are the ones you already know from team meetings, and the ones you "know" from online forums.Then there are the new friends you meet at the event, and there were plenty of those. I met Margie on the plane coming up from Melbourne and we kept running into each other everywhere and I sat with her and some other friends for the "I Am Creative" class on Friday night. Unfortunately, I was having trouble with my new camera and have been able to take very few photos with people in them, my upline Sue has provided me with some.


Judy, me, Sue, Toby and Tina, posing before the awards dinner.


Margie and me

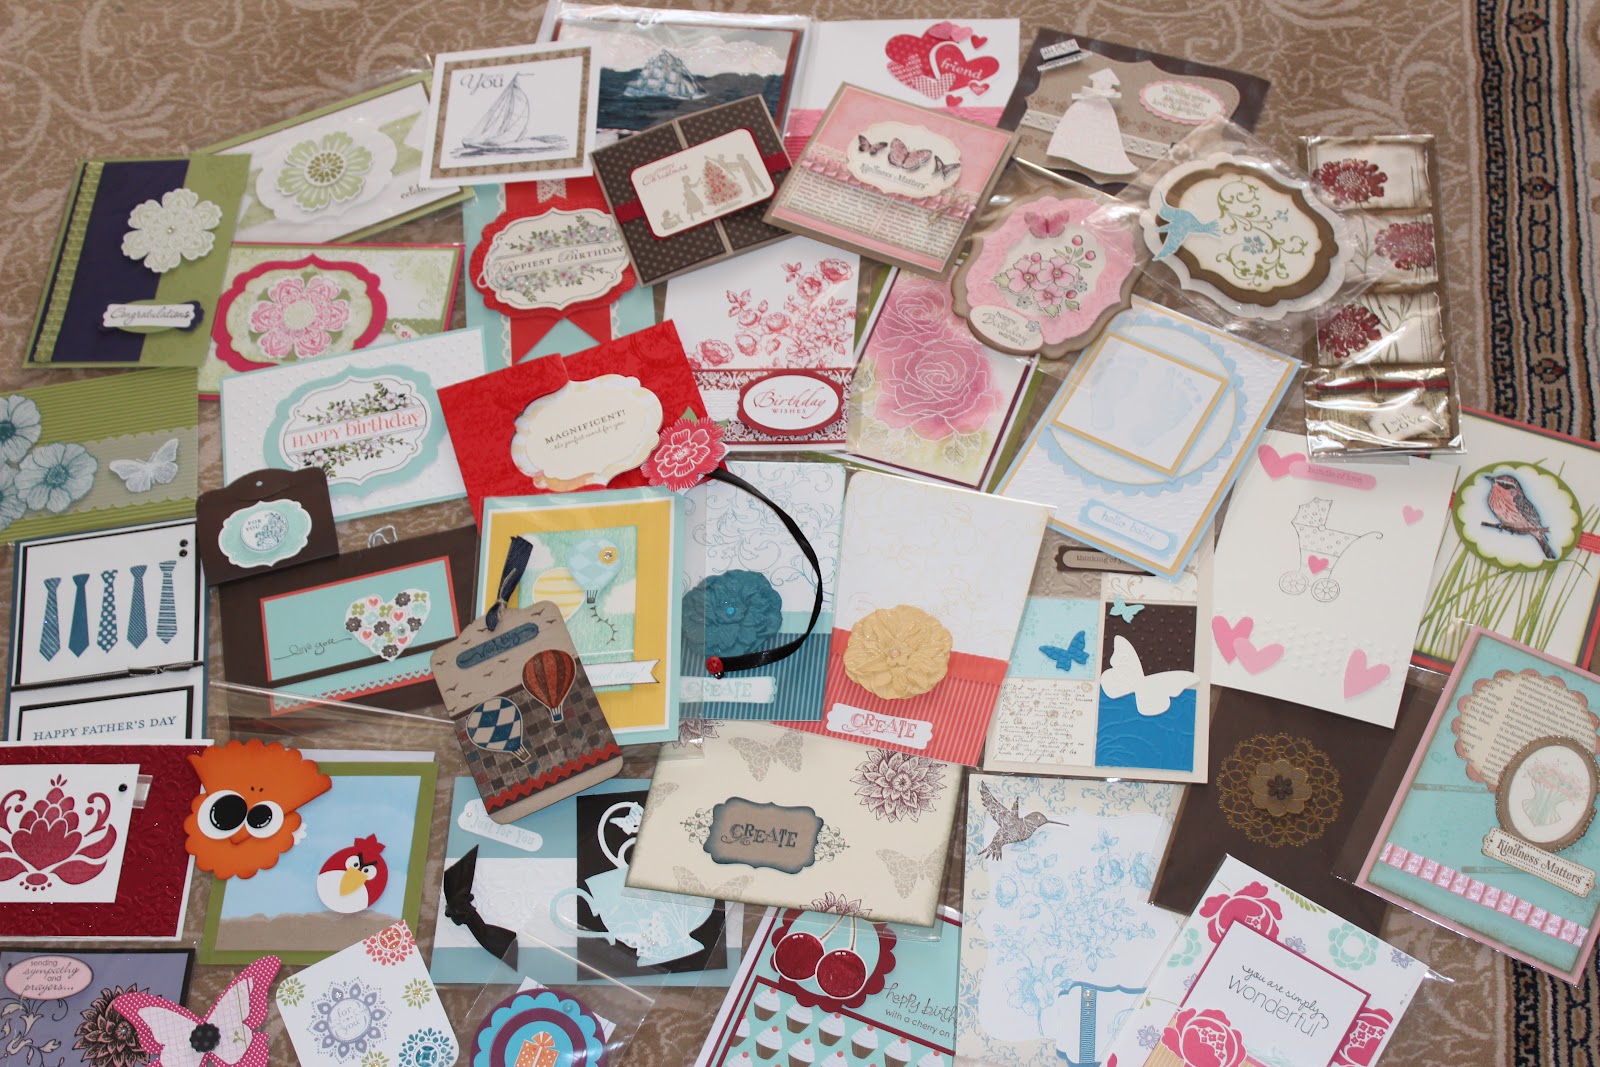
 Most demonstrators like to swap cards and other items like tags, bookmarks, matchbox folders and more, to share ideas and inspire each other. I received so many beautiful swaps, it is such a thrill to sort through them and they will keep on inspiring me for quite a while.


 These are the swaps I made for Convention, 30 of the top one using French Foliage stamp onto a Top Note DieMixed Blossom stamp onto Whisper White punched with the Blossom Punch and  Elegant Bouquet Embossing Folder on Wisteria Wonder put through the Big Shot. There is a layer of Rich Razzleberry behind and it is tied with Rich Razzleberry Ribbon, but some had the Wisteria Wonder Ruffled Ribbon.


 I made 20 of the card on the left, getting carried away with the Blossom Bouquet Triple Layer Punch, Postage Stamp Punch, and the Lace Ribbon Border. Mixing and matching colours and In Colour Printed Brads or In Colour Glimmer Brads, meant there was an interesting variety of colours, so I didn't get bored with my project.

And I only made 10 of the more subtle Thoughts and Prayers card, because I was running out of time. This stamp set is such a pretty one, double-mounted stamps with words suitable for get well cards or sympathy, but the sprig of flowers that I used and the simple tree on its reverse, are great for many types of cards. I used Thanks so Much from Three Little Words this time and knotted a piece of Artichoke Denim Ribbon at the bottom.

And here is a selection of the cards I received in return. Is yours here?

If you aren't a demonstrator, and would love to join me at next year's Convention in Brisbane (23-25 May 2013) contact me. It is only $169 to join and YOU get to choose the $235 worth of Stampin Up products that suit you. Free shipping on your starter kit. You don't have to do workshops or demonstate the product if you would rather just purchase for yourself the quarterly minimum ($400). You always get a 20% discount and you can drop out at any time with no obligation.

I will happily answer any further questions if you call.

Happy stamping, Rachel