Showing posts with label handmade cards. Show all posts

Thursday, 28 February 2019

February Thank You Cards #loveitchopit

More on the topic of #loveitchopit and this gorgeous, colourful paper is "How Sweet It Is" from the Occasions catalogue. In delicious, vivid colours of Coastal Cabana, Gorgeous Grape, Granny Apple Green, Melon Mambo and Pineapple Punch there is something to please everyone. I cut my bases to 14.5cm and score at 10.6cm, which leaves a strip of paper when you cut the 2 card bases from a sheet of card. Those strips are handy for stamping sentiments, and I find by making the measurement and even, memorable measurement, I can cut the layers so much easier too.


I hope you realise how much I value you purchasing your craft supplies from me. It means I am able to continue running my own little business, and even a small order can help me to make my minimums. In February, I received a number of orders, and decided to make a bunch of thank you cards all the same. Well...same-same, but different, as they say in Thailand!!! The same pack of paper, the same measurements and recipe, although the insides were all a bit different.


A nice finish for your handmade cards is to line the card, edge the white with a piece of DSP (pattern paper) and in this case, even a piece of twine, tied in a bow. It would be great if I need to design a new thank you card for March as well!!! Orders can be made anytime here and also directly to me in person or over the phone/email.  If you remember to add the host code, you will receive a gift from me.

NWEHVJGK


Product List

Sunday, 30 April 2017

Happy Mother's Day CTC#126


CASE-ing The catty is CASE-ing any catalogue (Annual or Occasions) and featuring Mother's Day. I love the bundle That's The Tag bundle on page 23 of the Occasions Catalogue, and sadly, it is one that hasn't found a place in the upcoming catalogue. I think the set is a 'must have', for the variety of tags you can make.


I made quite a few of these tags but haven't photographed them all. They were very useful at Easter to add something special to a gift. A plain gold foil tag was overlaid with a Melon Mambo tag with the leaves cut out. the sweet flower and matching tag was stamped in archival ink basic grey and I very roughly coloured the images with Stampin' Write markers. It took no time at all to put together a bunch of these. The egg cartons holding 4 eggs were the perfect number for my grandchildren, whose parents all try to keep their intake of sugar to a minimum.


For the cards I'm sharing this week, I began by building a tag using the butterflies. This cut out appeals to me because the butterflies look like they are in flight with the irregular wings. There were bits of butterflies from the insert for the inside of the card, and an opportunity to add any number of sentiments to the banner tag. Happy birthday was the sentiment I chose here, but there are several different sentiments in this stamp set, which fit the spot.


It appears that you can't purchase our Stampin' Up! Basic pearls at the moment, but don't worry, they'll be back after June 1st in a slightly different configuration. They do add a little something to the butterflies I think. I haven't placed any on the inside, but obviously you could.


And Voila! The finished card! The ladies in my recent class were asking whether I always finish the insides of my cards, and the answer is "Yes". mostly, anyway and there are a couple of reasons.
  1.  My personal style is 'clean and layered'.
  2.  With several layers on the front, the card is often rather 'front-heavy' and topples over, so layers on the inside balances that.
  3.  I feel the card is finished off better with layers inside.


Another card made after inspiration from the catalogue, and possibly Pinterest,  is this one with multiple tags - snipped & layered. Stamping on the background, rounding of corners with the Envelope Punch Board corner rounder, plus a lovely lacy doiley.


If you want to check out That's The Tag before it becomes unavailable you can see the stamp set here and the dies here . As they've been reduced, buying individually works out a dollar cheaper than buying in the bundle. 
We'd love to see what you have CASE-d from the Mother's Day section of either current catalogue. Share your picture on Facebook and if you have a blog, you can link back to a blog post.


Now you're heading over to Julia Quinn, her project is delightful


Happy crafting

Cheers, Rachel


Thursday, 24 November 2016

It's Beginning To Look A Lot Like Christmas AWH Bloghop


Today some of the Art With Heart Stampin' Up!® team have created some amazing Christmas projects to inspire you with the theme, "It's Beginning To Look A Lot Like Christmas!" We have tags, gift bags, teacher gift ideas, decorations and many more fun projects to create this holiday season.


To begin, I'm sharing this gift box, which I used to hold a gift for my Onstage room mate, Kathryn Mangelsdorf. Merriest Wishes was put to good use on this gift box, with simple stamping of the graduated spots all around, just in Smokey Slate. I had to put it aside and leave it to dry, as the box is so shiny it takes a while to set. There is an acetate sleeve included with these white boxes, which I tied a piece of the  silver ribbon around, to attach the tag. 


My chosen colours for the decorations were Emerald Envy and Real Red, and I cut one of each in the various dies in Merriest Tags Framelit Dies, that co-ordinate with the Merriest Wishes stamp set. Eight of these folded tags fit comfortably in this box, you could probably fit ten without any problems.


Using thick whisper white, I cut the cards 14cm by 7cm and managed to get quite a few from each sheet. Simply score at 7cm and you have a perfect square tag.


This year I was determined to get on top of the Christmas cards early, and surprisingly, considering how busy life has been these last few months, I think I've done it!!! My secret is mini-mass production, and if you think that sounds like a contradiction, I'll explain. 

Once the design has developed in my mind, I've endeavoured to make multiples. Ten or twelve is a good number to aim for, because once you've sorted the measurements you're already half-way there.


These Christmas cards are almost the same with some colour changes, but all the patterned paper was cut from Presents and Pinecones designer series paper, at the one time, so I kept repeating the dimensions (easy to remember that way). For the card above I chose to use the Jar Of Cheer with the sentiment stamped on the jar.


This card was even easier as I had the banners and trees already cut from another set of cards I made. Peaceful Pines and Banners For Christmas are the stamp sets for this.


Here we see Merriest Wishes back again, this lacy bauble is my absolute favourite. I have made good use of this set, it's a favourite for sure.

Recipe
Card Base - cut a sheet of A4 lengthwise at 10.5cm, score at 15cm
First layer - Fancy Frost SDSP (30% off 21-28 November) cut 10cm x 14.5cm
Second layer - 8.5cm x 13 cm
Third layer  -  DSP cut at 8cm x 12.5cm

Next, have a session of gluing. My choice for this is the Tombow Multi-purpose Liquid Glue, mainly for the way it gives a little leeway to line papers up evenly.
Lastly, decide on the embellishments you're using.
Easy-peasy?

If you find a broken link or have come to this blog hop from a different entry point, you can view the participants below:
  1. Rebecca Jacovou
  2. Ros Davidson
  3. Kathryn Ruddick
  4. Kate Morgan
  5. Rachel Palmieri
  6. Claire Daly
  7. Mary Kelly
  8. Monika O'Neill
  9. Tina Gillespie
  10. Kathryn Mangelsdorf
  11. Catherine Proctor
  12. Judy May

 So now you are leaving me, Rachel Palmieri, and heading over to the awesome Claire Daly

Cheers, Rachel

Monday, 14 November 2016

60th Birthday Cards - Handmade With Love

My husband celebrated a big birthday last week, which gave me excuses to make special cards and do some crafting with the grandkids.We kept the party low-key as we are a large family and rather noisy when we all get together. Unfortunately, I didn't get pictures with all the grandkids and their cards, some had also made a card at home.One d-i-l had put together an enormous card with a photo board inside of many significant family times featuring my husband. Our family definitely love the handcrafted cards!

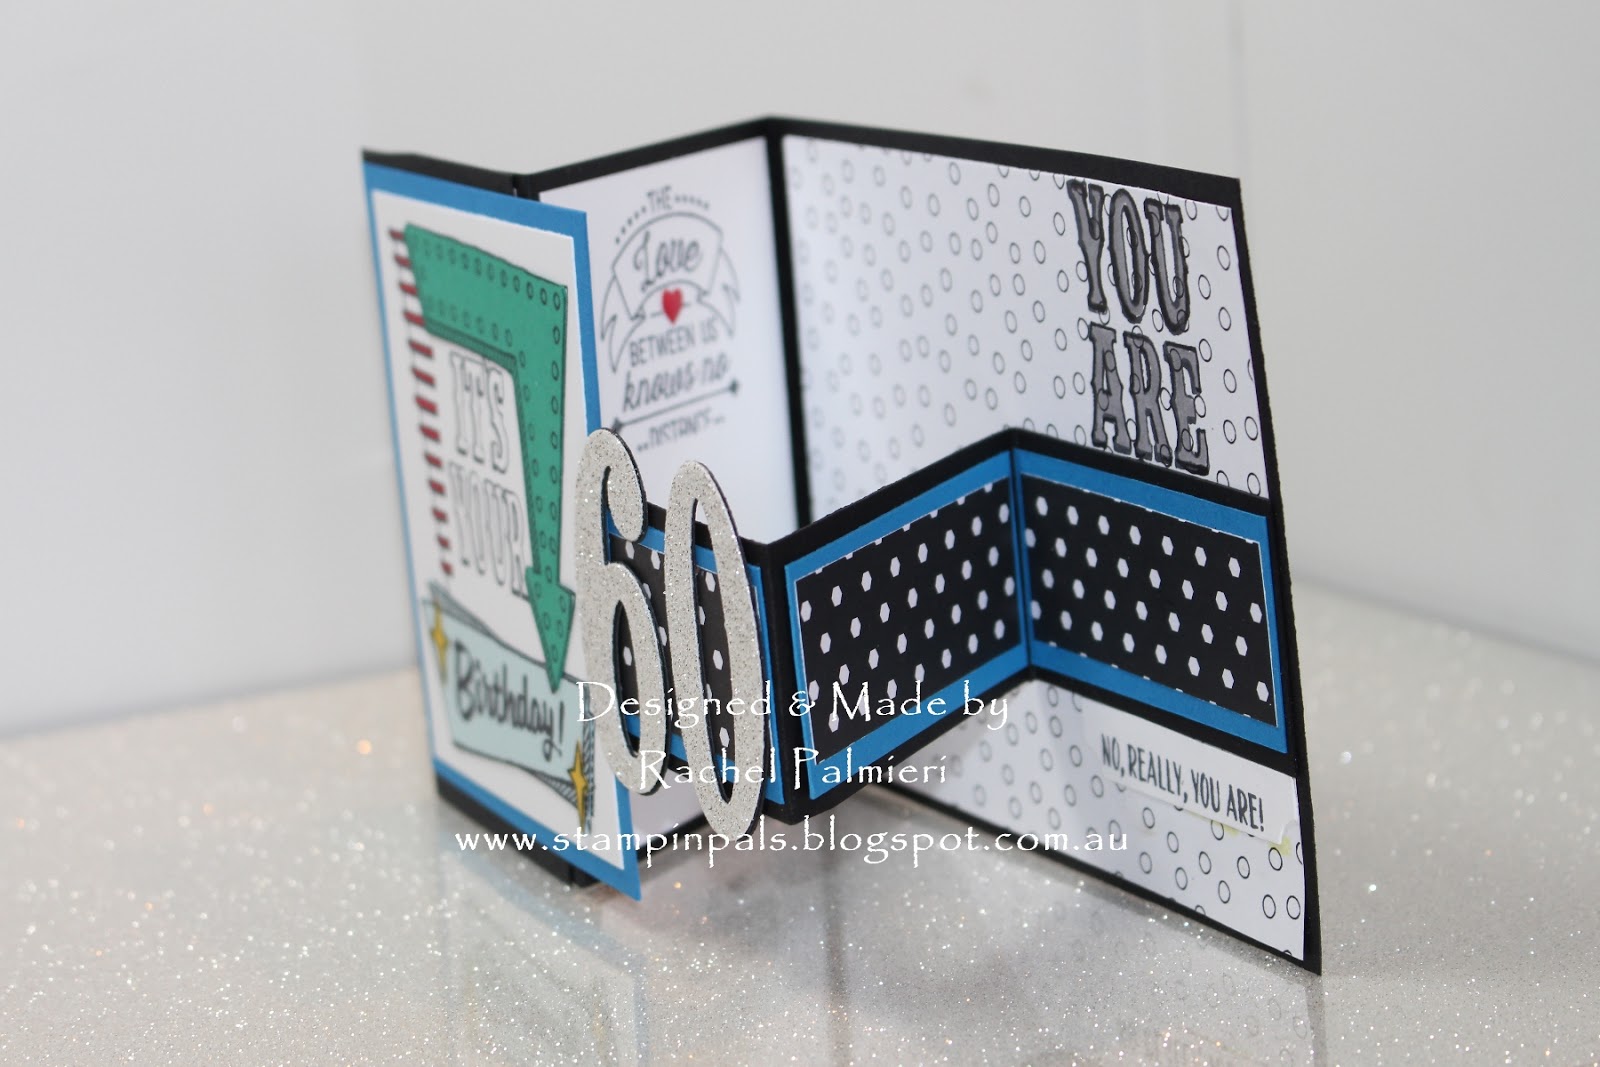
 I really enjoyed making this Double-Z card using Marquee Messages, stamped on different coloured card, then cut and pieced. It isn't particularly difficult to do and makes an easier way of adding some colour. I have a class making this card on Friday 18th November, at my studio in South Morang, Victoria.
 This version of the Double-Z has an extra piece added to the front to accommodate the larger size of the stamp from Marquee Messages. The patterned paper is two different types of black & white spots, just for fun.
When a stamp retires, I don't neccesarily sell it, if the sentiment is significant to me. Going Global was in a mini catalogue in the last year or so, but didn't make the cut into the Annual catalogue. It still sits on my shelves, because of the sweet sentiments included.


Our sons bought a massive state of the art barbecue for my husband, and just because I was feeling creative, and really wanted to use the Sliding Star Framelit to cut the track around for a star from Superstar, I made them a group card too. The boys are mainly tradesmen, an electrician, plumber and carpenter, while my husband has worked in many trades over the years. Guy Greetings has some marvellous sentiments, very suitable for those tradie types.

In This World and Ghoulish Grunge helped to ink up the inside of the card too, with all sorts of architectural stamps. Both sides on the inside of the card were layered, which gave the 5 sons plenty of room to write messages to their dad.

 We used props for some funny photos and the youngsters really got on board with it, as did a couple of the adults. We always do this at Christmas, but we've had an early practice run this year. Below is our little group of grandies, ranging in age from 2½ - 8 years.
We know how blessed we are to have these wonderful people in our lives, and I treasure gatherings like this celebration.

Cheers everyone,
Rachel