Showing posts with label Oceanfront. Show all posts

Thursday, 14 March 2024

Swaps For Onstage - Reverse Masking Technique

As this blog goes live, I will be very excited heading into the first stamping event for Melbourne Onstage 2024! If I don't already, very shortly I will have a new stamp set from the soon-to-be-released Stampin' Up! Annual Catalogue 2024-2025 - I chose Country Flowers bundle, so stamps and dies for this one. I'll share some cards soon.


One thing we do at Onstage is swap with other demonstrators, and you may be one who is visiting my blog to find out a little more about how I made my swap.


I mounted the Coffee With Friends ladies on the bench and the sentiment on the one block so they were lined up perfectly. These first few were stamped in Tuxedo Black Momento before I decided that I preferred Early Espresso. It stamps just as dark as black, and the ink seemed more even.


After the images are stamped, it is time to stamp and cut masks. You can use the mask 2-4 times before it gets too wet with ink and tears, but it was a lot of fiddly fussy cutting for those masks, ha ha!


The top stamp in Oceanfront is the one I used for the sky with Boho Blue. The grass was the middle stamp, inked up in Granny Apple Green and stamped twice in opposite directions for good coverage.


After the first tries, I featured the sky more prominently, and full strength instead of stamped off as above. The masks do need to be peeled of carefully both to be able to re-use them and to not damage the image they masked.
 

The stamped piece was die cut with Countryside Corners dies and I lost some of the stamped grass I had added from the Oceanfront stamp, but it was worth it. The Boho Blue layer was cut with another Countryside Corners die. It has been embossed with the Splatters 3D embossing folder from the duo Stripes & Splatters TIEF. These smaller folders fit the mini Cut n Emboss machine.


Another rectangle layer was added in Misty Moonlight and for a finished card I would glue it straight to a Boho Blue card base. My card bases are cut at 14.5cm across the middle of an A4 piece of card because it ties in better with the American measurements the dies come in.
Happy crafting,


Tuesday, 12 March 2024

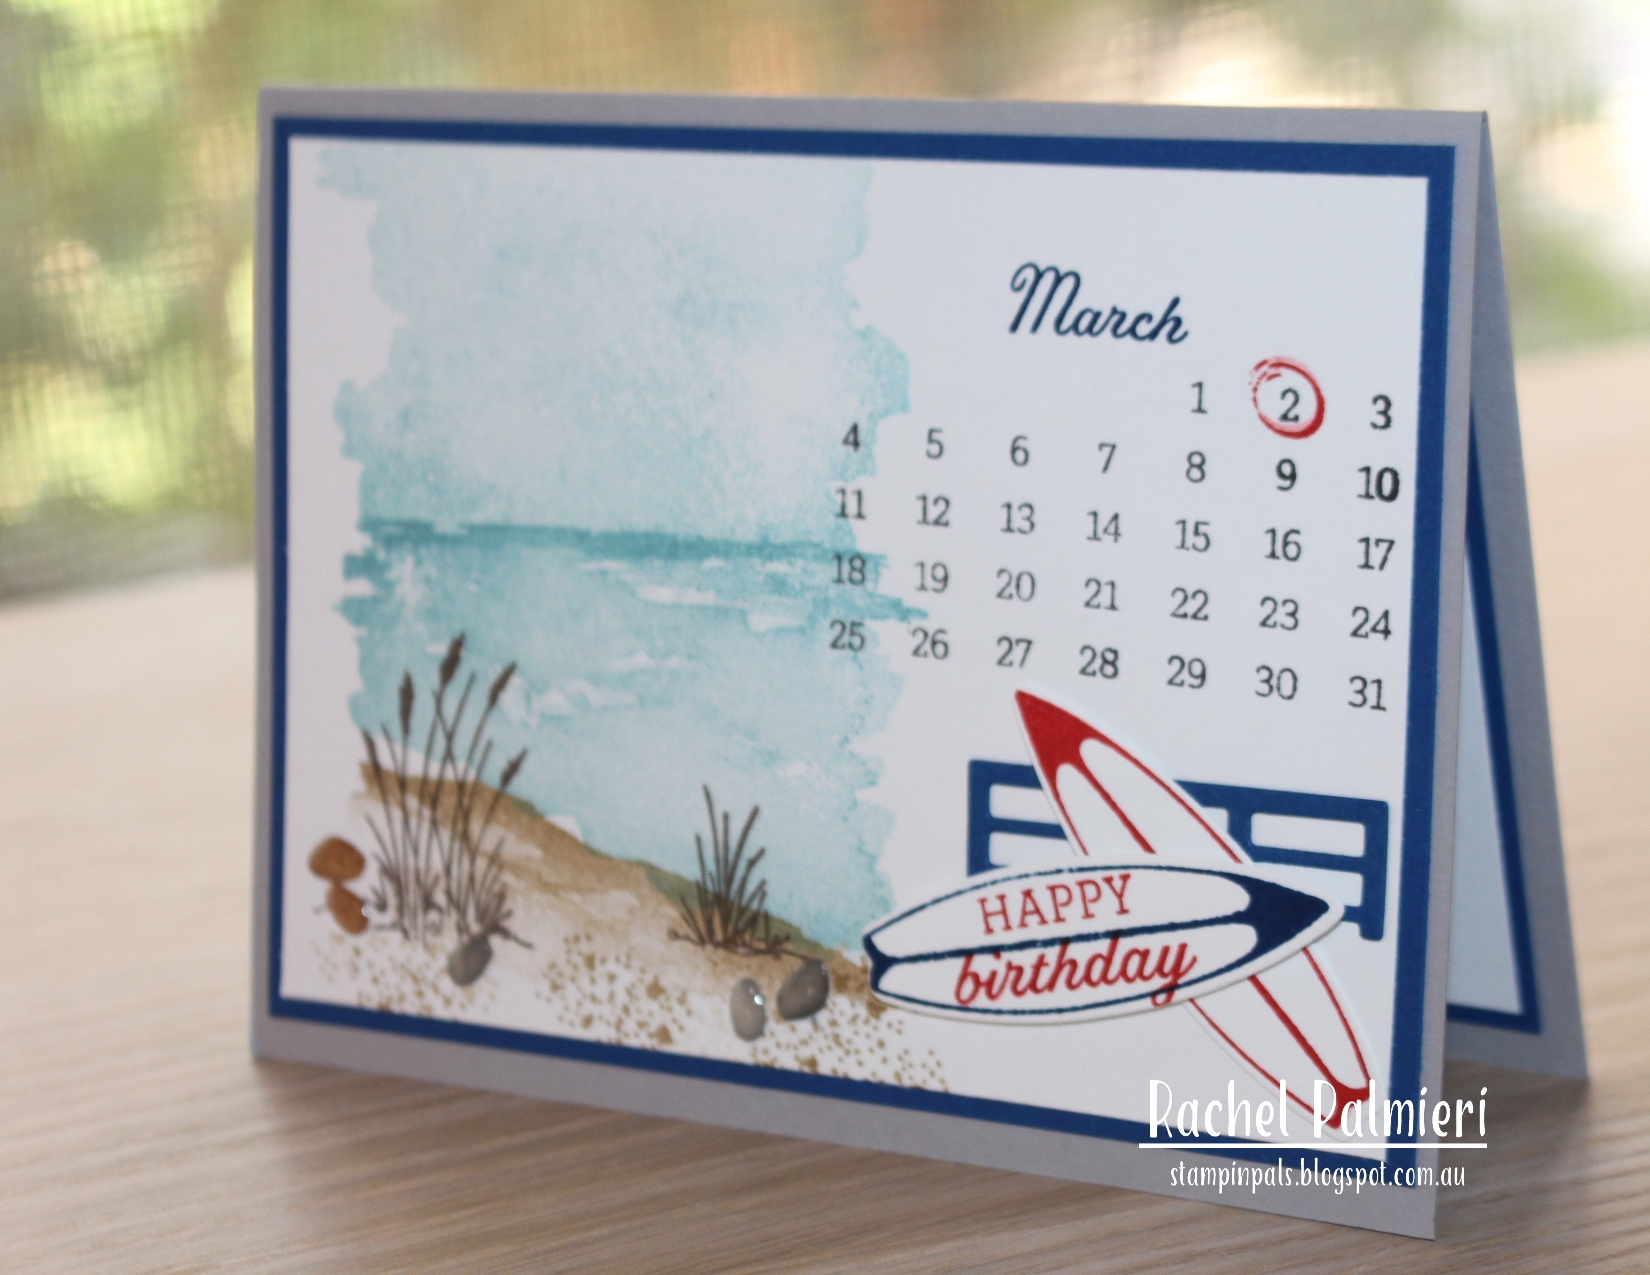
Beach Days


 One of the joys of making a handmade card is being able to personalise it. This one reflects the recipient's birthdate, abode and interests, although at 48 his shoulders are saying they don't like to 'paddle out" for too long!!!

Oceanfront provided the scenery - the sky, water, sandbank, grasses while Beach Days has many of the items that fit with an ocean scene. I took a small fence and the surf boards, but for younger folk there were sandcastles and beach balls, for the more sedentary there
is an umbrella and deck chair.

I may end up using this calendar set from Days to Remember for all the men in my life at some stage. It's quite a good option when you're a bit stuck!

Happy crafting,


Friday, 16 February 2024

Masking a Focal Image.


I shared the card on the left here earlier this week and decided to make a simpler one to explain the technique.
 

Using either a post it note or even better, Stampin' Up! masking paper, stamp the image of the family fishing (Beside Me). Cut around it on the lines but don't worry about the fishing rods.


Using 3 stamps from
Oceanfront, stamp 3 shades of blue over the masked group. The smallest stamp at the bottom in Lost Lagoon, next Coastal Cabana and finally Pool Party for the sky.


You could colour the image once you remove the mask, but in this case I decided to leave it. A little more stamping from Oceanfront and this card is finished.


All products used to make these cards are Stampin' Up! and are available in my online store or contact me to find out more details.It is a good time to shop during February as SALE-A-Bration continues until the 29th where you earn free product with every $90 increment of your order, so one stamp/die bundle will usually get you there, but it is also a good time to stock up on the basics like card and glue.


SHOP
Your orders are very much appreciated, no matter how small or big, every little bit helps me to meet my minimums, and keep on creating. Hopefully you are inspired by some of the projects I share and want to make your own. My online shop is open anytime and delivery by tracked Australia Post takes 5-10 days.
Y23ZQY7G


Happy crafting, 


Sunday, 8 October 2023

CTC # 440 CASE an Embossing Folder project from Mini


CASE-ing The Catty Crew are a group of Stampin' Up! demonstrators from Australia & New Zealand who take inspiration weekly from the catalogues. The catalogues are a fantastic resource, and we love to inspire you to seek inspiration there too.


This week at CASE-ing the Catty we are CASE-ing a project using embossing folders. Embossing folders are an effective way of adding some texture to your project.


I found a project to CASE on page 60 of the mini catalogue. I don't have that stamp set but it was easy to substitute for Oceanfront, another ocean-themed stamp which hadn't seen ink for a little while.


On the original, the front was cut out using Countryside Corners dies, and I also used it, adding a stamped frame as well. 


Exposed Brick was my choice of embossing folder, only because it is a favourite of mine. I had considered Twisted Rope, and it might have suited the ocean theme a little better.


Needing some birds, I pulled Beside Me from the shelf, and Days to Remember for the sentiment.


A layered inside and two small, stamped images finish off the inside.


We love for you to share your projects using the challenges. We do request that the projects you submit have been created especially for this challenge. You can CASE directly or be inspired by a sketch/layout, colour combo or embellishment. Ask to join our Facebook group, and then add a picture of your CASE letting us know which card or project you've CASE-d.


The talented Julia Quinn follows me this week.


Fancy Giving Yourself An Early Christmas Present?


Stampin’ Up! are celebrating their 35th anniversary this year, and what better way to do that then with a special Starter Kit offer? From 3 to 31 October, new demonstrators will be able to choose either 35% OFF the cost of their Starter Kit or get 35% MORE product. If you have any questions about this offer, please don’t hesitate to get in touch or click on FAQ to read more.

Frequently Asked Questions


Option 1: Get 35% OFF the normal cost of a Stampin’ Up! Starter Kit. Those who select this option will receive $235 AUD worth of product for only $109.85 AUD!


Option 2: Get 35% MORE product with their Starter Kit. Those who select this option will receive $317.25 AUD worth of product by spending $169 AUD!


No matter which option new demonstrators choose for their Starter Kit, both provide them with free business supplies and free shipping on their Starter Kit—not to mention all the fun that comes with being part of Stampin’ Up!


FREE OnStage@Home Registration

It gets better! Those who sign up for a Starter Kit during this offer will also be automatically registered for FREE* to our virtual OnStage event on 11 November—a $123 AUD!

  • Those who sign up for this offer have the opportunity to watch the event independently, gathered together with other demonstrators, or with their Team Leader.

  • Demonstrators who join during this promotion will be automatically added to the OnStage attendees; they do not need to register separately.

  • Demonstrators who join during this promotion will also receive an email with all the information about this event. 

*Please note that free registration will not include the gift box.